Exactly How You Should Use Rocks in Flower Beds
Using rocks in flower beds adds structure, texture, and four-season interest while reducing day-to-day maintenance. The key is to design with intention: limit your stone palette, set the right depths, and pair rock choices with plants that love sharp drainage and radiant warmth. Before we dive in, here’s a quick starter plant list you can match to common stone tones to get a cohesive look fast.
- Silvery/blue stones: lavender, blue fescue, eryngium, white candytuft
- Warm buff stones: thyme, dianthus, sedum ‘Autumn Joy,’ coreopsis
- Black/basalt fines: chartreuse sedges, euphorbia, pink rock soapwort
Use this list as a palette guide: repeat stone color in foliage, flowers, or seedheads so the bed reads calm and intentional all year.
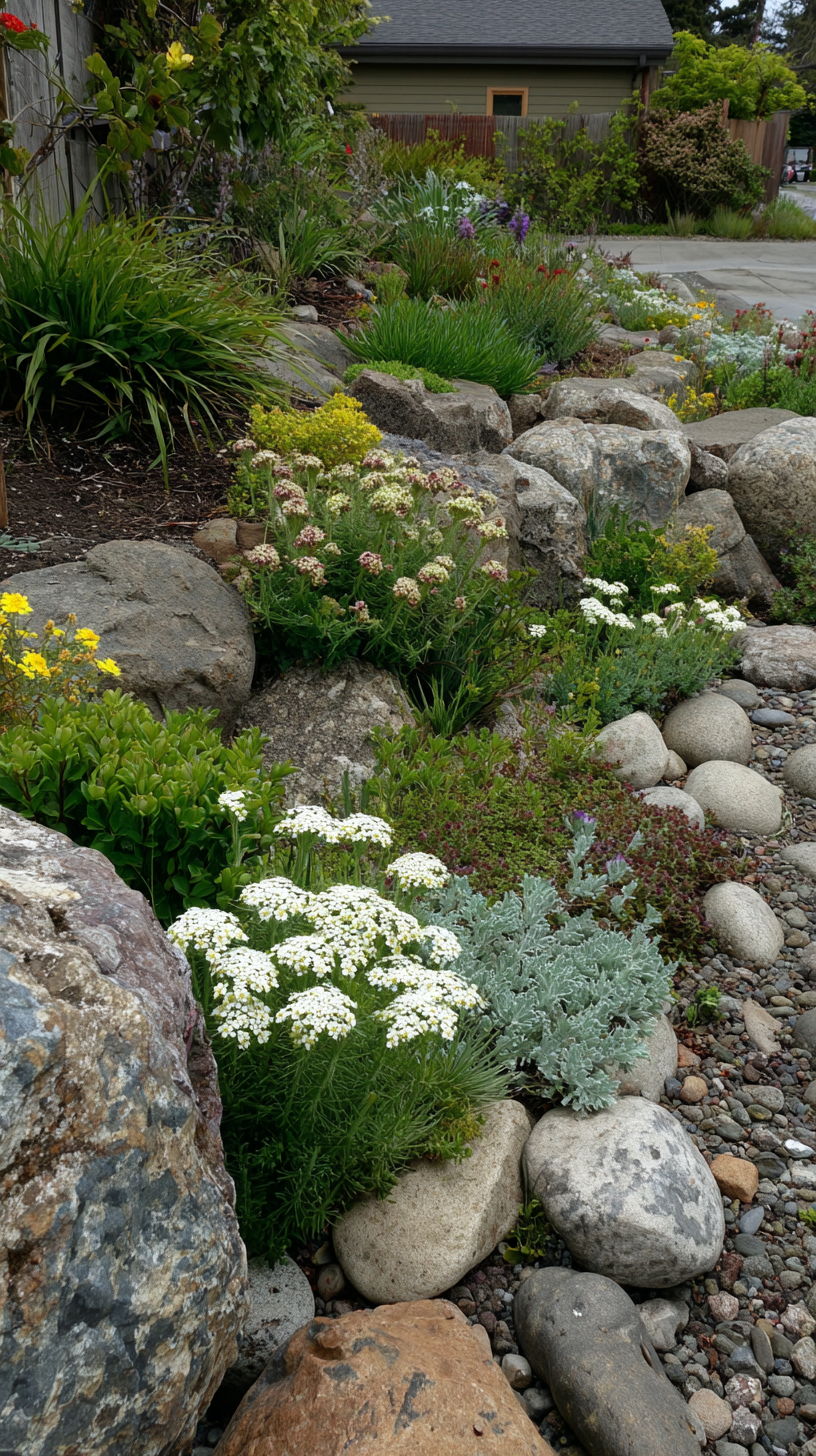
1. Pick One Rock Palette and Stick to It
Why it works: A limited stone palette removes visual noise so plants and form take the lead. Repeating one rock color/texture ties separate areas together and makes small spaces feel designed—not cluttered.
How to Implement:
- Choose a hero stone: Pick one primary rock (e.g., limestone, granite, basalt) that matches your home’s materials and light conditions.
- Keep accents subtle: If you add a second stone, use it sparingly (10–20%) to highlight focal areas or transitions.
- Test in daylight: Lay a sample tray outside; view at midday and golden hour to confirm color harmony with siding and plants.
Placement tip: Repeat your hero stone at bed edges, in a focal boulder, and again as a thin gravel top-dress.
Styling tip: Mirror stone hue in foliage (blue fescue with blue-gray limestone; chartreuse sedge against black basalt).
Budget alternative: Use locally sourced quarry offcuts or construction rubble (cleaned) in consistent color families.

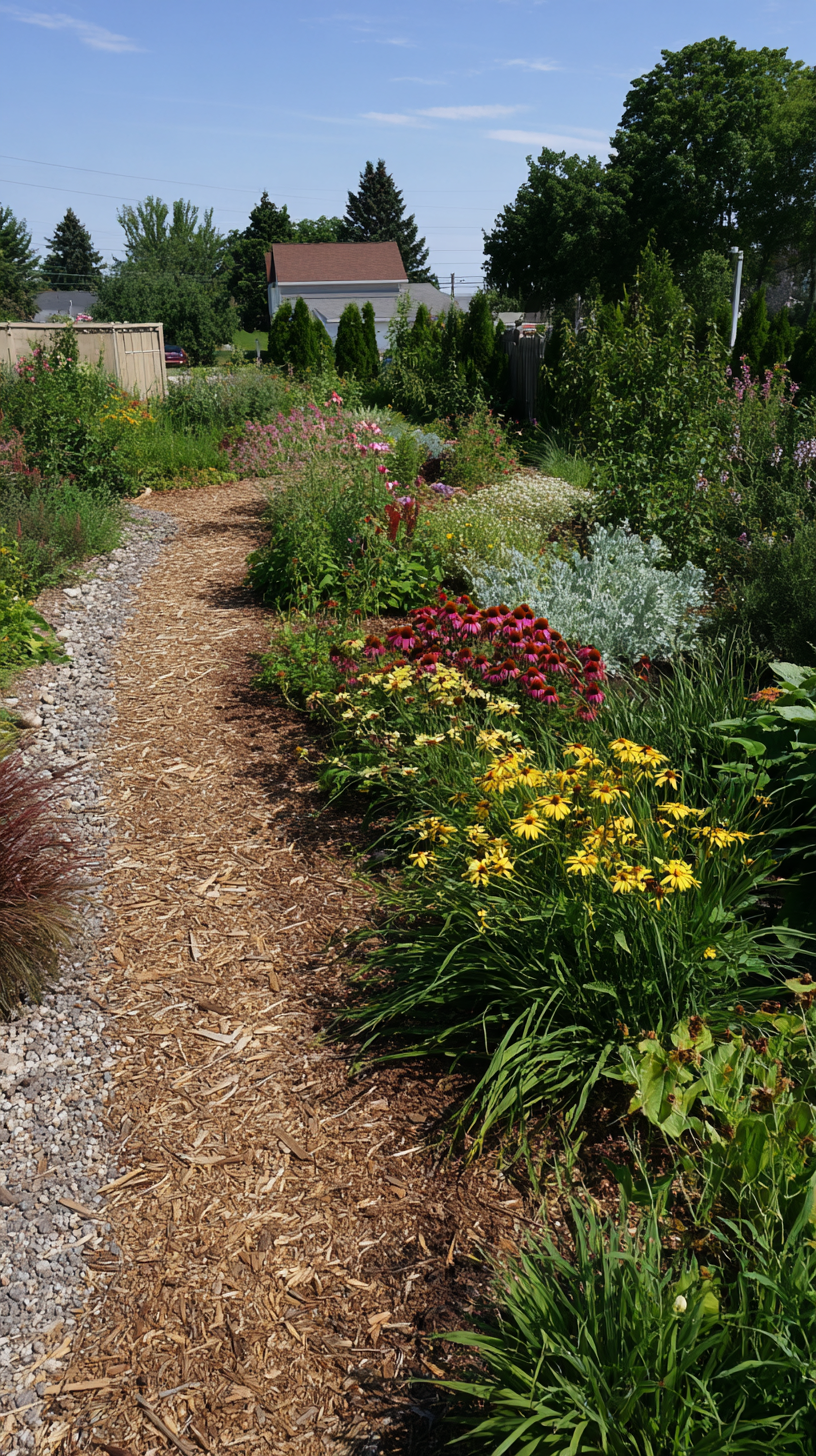
2. Match the Rock to the Job

Why it works: Angular, crushed gravels interlock and stay put for paths; rounded pebbles roll and migrate but look natural in swales and decorative zones. Picking purpose-built materials prevents ongoing fixes.
How to Implement:
- Paths = angular: Use 3/8″ minus, decomposed granite, or similar for firm footing and wheelbarrow-friendliness.
- Creeks = rounded: Use river rock/pea gravel for “water-worn” realism in dry creek beds and ornamental pockets.
- Beds = match scale: Finer gravel around small perennials; larger cobbles overwhelm delicate plants.
Placement tip: Confine rolling stones (pea/river rock) inside edged or recessed areas to limit drift.
Styling tip: Repeat the path’s angular gravel as a thin “scree” under focal plants for visual unity.
Budget alternative: Ask local suppliers for “screenings” or “fines”—often cheaper than bagged gravels.

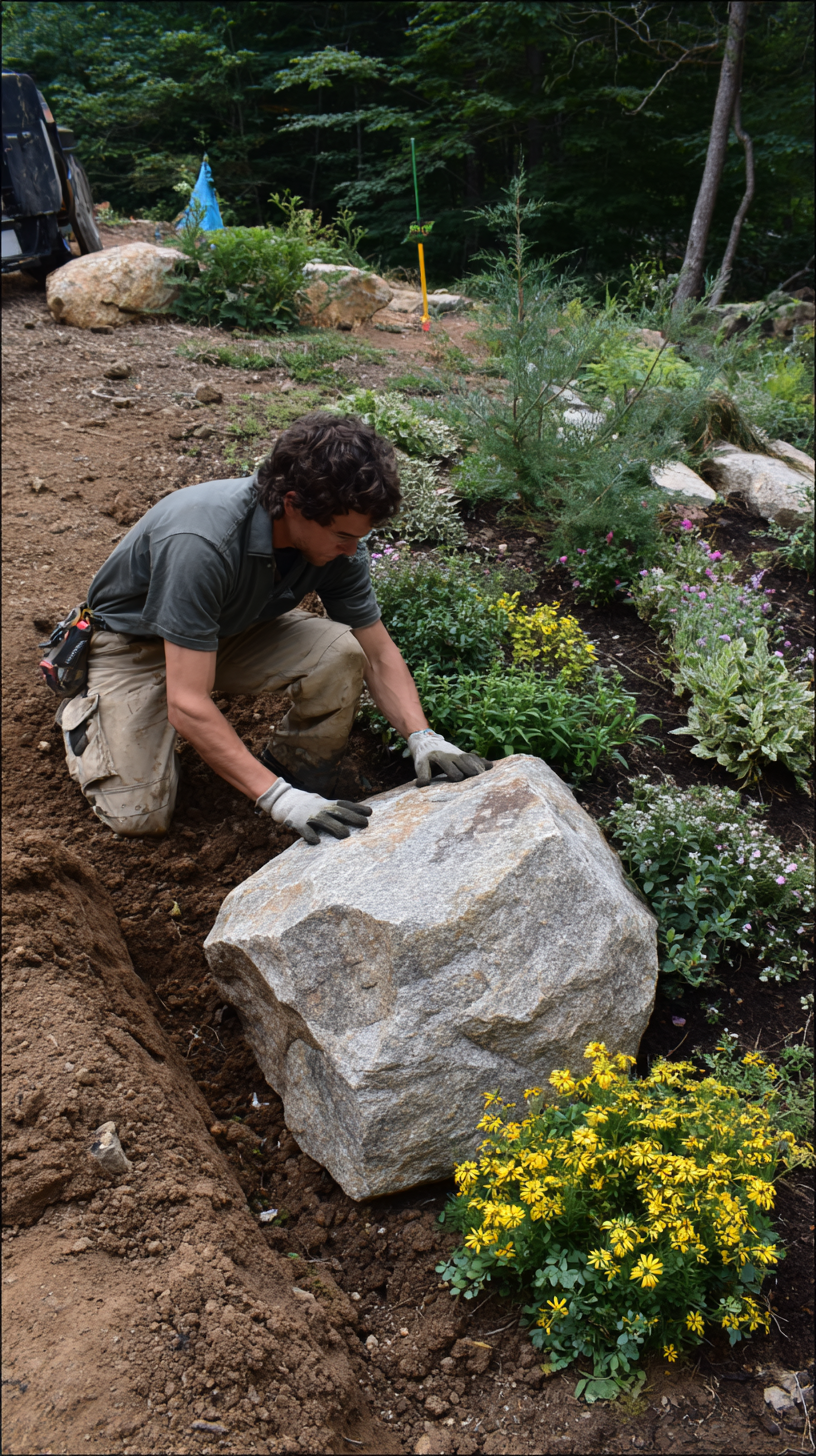
3. Bury Boulders One-Third to One-Half

Why it works: Partially burying boulders makes them look geologically “rooted,” prevents wobble, and resists frost heave or slope creep.
How to Implement:
- Dig a cradle: Excavate a basin matching the boulder’s footprint; compact the subgrade for stability.
- Set face-forward: Rotate until the most natural face looks upslope; bury 1/3–1/2 for realism.
- Backfill in lifts: Tamp soil; water to settle; add a thin gravel scree to knit into the planting.
Placement tip: Place boulders where you want winter focal points—intersections of views, path bends, or bed ends.
Styling tip: Soften with tufts of thyme, dianthus, or sedum spilling over the buried edge.
Budget alternative: Use 2–3 medium “cluster stones” instead of one giant boulder for similar impact.
4. Get the Scale Right with an Anchor-to-Scree Mix

Why it works: A ladder of sizes—big anchors, mid transition stones, and fine gravel scree—creates depth, order, and tidy edges while letting plants weave naturally.
How to Implement:
- Pick 2–3 anchors: Place the largest stones first to set sightlines and massing.
- Bridge the gap: Use cobbles to step down scale between anchors and gravel.
- Knit with scree: A thin gravel layer ties the composition and suppresses weeds.
Placement tip: Triangle groupings read more natural than straight lines.
Styling tip: Repeat plant clumps on both sides of an anchor stone for rhythm.
Budget alternative: Replace some anchors with planted mounds to save on stone tonnage.

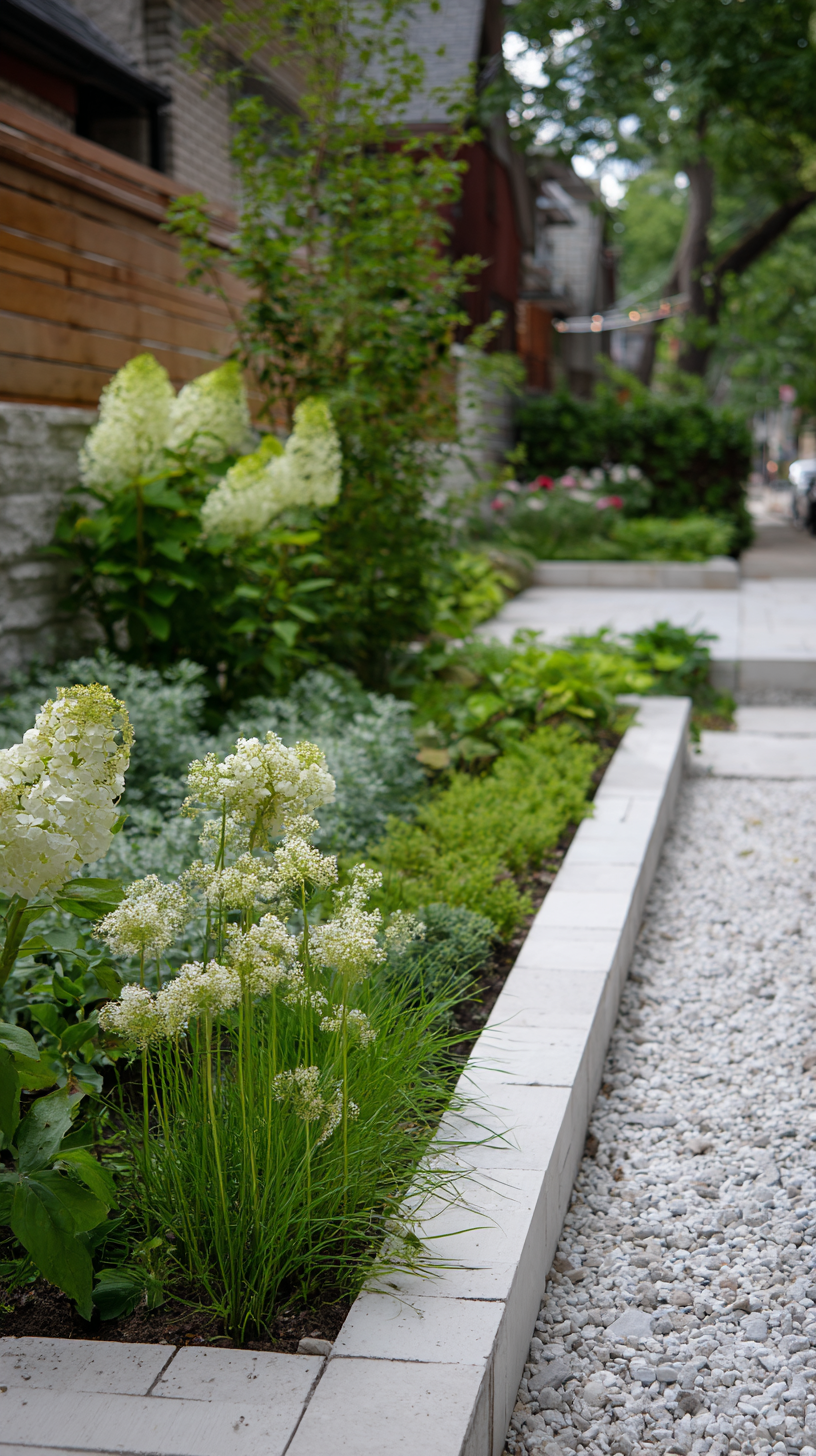
5. Keep Gravel Shallow (½–1″)

Why it works: A thin, even layer looks crisp and supports plant crowns without swallowing small perennials or feeling spongy underfoot.
How to Implement:
- Measure at edges: Use a ruler against edging to keep depth consistent.
- Feather to crowns: Keep gravel slightly thinner right at plant bases.
- Top up lightly: Add a small bag each spring to refresh color and coverage.
Placement tip: Focus gravel where you need visual continuity—front edges and around focal stones.
Styling tip: Mix 5–10% of a slightly darker or lighter chip for subtle marbling.
Budget alternative: Use stone only as a 12–18″ front border; mulch the rest with composted bark.

6. Add Edging for Crisp Lines and Less Drift

Why it works: Edging keeps gravel from bleeding into lawn or paths and gives instant “finished” energy even in naturalistic designs.
How to Implement:
- Choose materials: Powder-coated steel for sleek curves; brick or stone-on-edge for cottage charm.
- Set flush: Keep the top 1/4″ above grade so the stone stays in but mower decks glide.
- Pin securely: Spike steel or set pavers on a compacted sand base to avoid movement.
Placement tip: Edge any interface of different materials (lawn/gravel, bed/path).
Styling tip: Echo your home’s metal finish (black, corten, galvanized) in the edging.
Budget alternative: Recycle straight pavers from marketplace listings to create a soldier course.

7. Shape a Dry Creek Bed to Guide Eyes and Water

Why it works: A shallow swale lined with rounded stone creates a focal “flow,” slows runoff, and frames plant drifts beautifully.
How to Implement:
- Cut a gentle swale: 2–4″ deep with tapered sides; no hard edges.
- Bank and bed: Larger stones on the banks, pebbles in the center for a natural look.
- Feather with plants: Use grasses and thyme to blur edges into the bed.
Placement tip: Align the “flow” with your main sightline from the house or patio.
Styling tip: Place a focal boulder at a bend to mimic a natural eddy.
Budget alternative: Create a mini-runnel 10–12″ wide if space or budget is tight.

8. Tame Slopes with Clustered Boulders

Why it works: Groups of partially buried stones act like micro-retaining walls, creating pockets where roots can grip and water can soak.
How to Implement:
- Step the cluster: Stagger stones up the slope in irregular triangles.
- Key each stone: Bury 1/3 and use compacted subsoil beneath for strength.
- Plant pockets: Backfill with gritty mix; add drought-tolerant perennials into the niches.
Placement tip: Start near path edges or grade breaks where erosion shows first.
Styling tip: Repeat a grass (blue fescue or carex) in each pocket for rhythm.
Budget alternative: Use smaller “armour” rock in clusters instead of large boulders.

9. Plant for Rock Country: Drought-Tolerant, Sun-Loving, Shallow-Rooted

Why it works: Plants adapted to lean, well-drained soils thrive among stones and visually soften hard edges without constant watering.
How to Implement:
- Choose doers: Alyssum, candytuft, dianthus, thyme, blue fescue, small salvias, sempervivum.
- Plant high: Keep crowns slightly proud of surrounding gravel to avoid rot.
- Cluster in threes: Repeat small groups to make intentional “drifts.”
Placement tip: Tuck groundcovers into stone crevices and let them spill.
Styling tip: Echo stone color in flower or foliage tones for cohesion.
Budget alternative: Start with plugs or divisions instead of gallon sizes; they establish fast in gravel.
10. Respect Heat & pH: Match Plants to Rock Mulch
Why it works: Stone absorbs/radiates heat and some stone types trend alkaline. Choosing plants that enjoy warmth and neutral-to-alkaline soils prevents stress and chlorosis.
How to Implement:
- Group by tolerance: Heat-lovers in gravel; acid-lovers (azalea, rhododendron) in organic mulch beds.
- Test a patch: Trial one bed before converting your whole garden.
- Mix mediums: Use gravel only where it benefits plants and look, not everywhere.
Placement tip: Put gravel beds in full sun or reflective heat zones; keep tender plants in cooler microclimates.
Styling tip: Use warm-toned stones to amplify sunset colors; cool blues for a calm, coastal vibe.
Budget alternative: Amend existing beds with a thin gravel “face layer” instead of a full-depth rebuild.

11. Weed Control That Breathes (Fabric Sparingly)

Why it works: Woven fabric under paths keeps gravel from sinking while allowing drainage; in planting zones, open soil lets roots knit and microorganisms thrive.
How to Implement:
- Use under paths only: Lay fabric over compacted base before adding angular gravel.
- Skip in beds: Rely on shallow gravel, pre-emergent where appropriate, and seasonal top-ups.
- Edge the fabric: Overlap seams 6″ and pin every 18″ to prevent creep.
Placement tip: Fabric any high-traffic or cart route; leave plant areas breathable.
Styling tip: Hide fabric edges with a narrow row of cobbles before the planting begins.
Budget alternative: Newspaper/cardboard under paths as a temporary separator; renew as needed.

12. Build Paths That Actually Stay Put

Why it works: Angular gravel plus proper edging gives stable footing; flush stepping stones make the route comfortable and accessible.
How to Implement:
- Compact the base: 2–3″ of compacted road base under 1–2″ of angular gravel.
- Set stones flush: Bed pavers/steppers in sand so edges don’t trip feet or mower wheels.
- Edge both sides: Steel, brick, or stone to contain gravel and keep lines crisp.
Placement tip: Align paths with natural desire lines between doorways, hose bibs, and sheds.
Styling tip: Slightly curve long paths to reveal the garden in stages.
Budget alternative: Use salvaged pavers as stepping “islands” embedded directly in compacted gravel.

13. Containers Near Beds: Skip Rocks in the Bottom

Why it works: Rocks at the bottom raise the perched water table and can cause root rot. A clear drainage hole does the job; a shard over the hole keeps soil in place.
How to Implement:
- Drainage first: Ensure pots have holes; use a liner pot inside decorative cachepots if needed.
- No false layers: Fill with potting mix to the base; top with a thin stone mulch if desired.
- Right scale: Choose pot sizes that visually balance nearby boulders.
Placement tip: Group containers beside anchor stones to create a layered vignette.
Styling tip: Match pot finish to stone tone (matte black with basalt, sand with limestone).
Budget alternative: Drill drainage in inexpensive plastic planters and sleeve them into thrifted pots.

14. Make Maintenance Easy on Yourself

Why it works: Simple habits—blowing debris before it composts, raking drift, and light top-ups—keep stone areas pristine with minimal time investment.
How to Implement:
- Seasonal sweep: Clear leaves in autumn and late winter before they break down.
- Spot top-ups: Keep a spare bag of matching gravel for quick refreshes.
- Weed early: Pluck seedlings while small; a thin scree prevents most from rooting.
Placement tip: Avoid placing heavy leaf-droppers directly over fine gravel zones.
Styling tip: Use a contrasting gravel stripe as a “maintenance path” through dense beds.
Budget alternative: A stiff push broom can replace a blower on small beds and patios.

15. Design for Winter Bones and Year-Round Interest
Why it works: When perennials die back, rocks hold the composition. Evergreen tufts, seedheads, and textured bark keep beds engaging until spring.
How to Implement:
- Place winter anchors: Set boulders where you want the eye to land from house windows.
- Evergreen accents: Include low sedges, compact conifers, or heaths for winter color.
- Leave seedheads: Resist cutting all stems; frost-kissed textures are a feature.
Placement tip: Build vignettes visible from your most-used rooms first.
Styling tip: Contrast dark stone with pale grasses for a graphic winter scene.
Budget alternative: Use willow or hazel prunings as seasonal sculptural stakes near stones.